I recently acquired this lovely McIntosh PF-2510I-A 6-disc in-dash CD changer. This model was available as an option in the North American market Subaru Legacy and Outback. It is often but incorrectly referred to as the PF-25201 or PF-25201-A.
McIntosh PF-2520I-A. Yes those are solid aluminium knobs!
Fortunately it shares the same connectors and pinout as the Japanese and Austrailasian market Legacys so can be fitted in cars destined for other markets with very little effort. Having said that there are a couple of gotchas. Read on… Continue reading →
Stripboard Magic is a Windows application for designing PCB layouts on stripboard (aka prototyping board). It was released by a British company called Ambyr which ceased trading a long time ago. The interface is a quite primitive and a little strange but the program is functional even on Windows XP. It also works great in Linux using Wine. Continue reading →
Here’s a quickie on adjusting the gain of the OEM-suppliedMcIntosh subwoofer in many BE and BH series (MY 1998-2003) Subaru Legacy’s. The subwoofer gain and crossover frequency is non-adjustable, at least until now. : ) If you have such a car and want to get a little more punch from the sub, read on!
The amplifier is bolted to the floor under the drivers seat and has two connectors on the end closest to the door. Disconnect and unbolt the amplifier and take it apart. Make a careful note of where each screw goes as they are not interchangeable; you can permanently damage the amp by shorting things out of you replace the screws incorrectly.
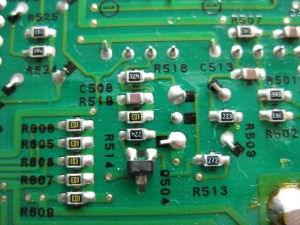
Find R519 on the underside of the PCB near the power and speaker connector. In station wagons this is rated at 10k and in sedans 4.7k, labeled as either 103 or 472 respectively. This resistor sets the negative feedback in the final stage of the subwoofer crossover.
Identifying R519
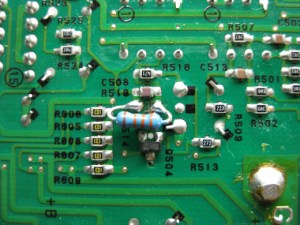
Replace this resistor with a higher value to increase the gain. Don’t leave it out of the circuit or it may overdrive the sub and do damage. If you short it you will mute the sub entirely.
R519 replaced
After some experimenting I feel 33k delivers quite a nice bit of punch in a station wagon, which should boost the sub by about 5.2dB. Feel free to choose any value you want between 10-100k. Be careful using high values as it becomes quite easy to inadvertently overdrive the sub.
You might want to use a potentiometer instead so you can adjust the sub gain as you please. If you do this, I suggest a 50k linear (type B) pot in series with a 10k resistor. Make sure you use shielded cable and keep the cable very short to help prevent any instability in the amp. Connect the cable shield to a suitable ground point in the amp and (ideally) a 100nF or similar capacitor between the cable shield and the pot casing to prevent possible ground loops.
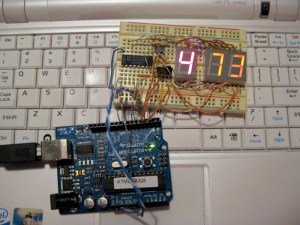
Here’s an example on multiplexing three seven-segment LED displays from an Arduino using a single 4511 IC and a handful of transistors. This builds on my last post about interfacing to a single display
The LCD on my Sharp microwave oven recently failed, beginning with a few segments but quickly getting worse. I’ve seen quite a few similar models with the same problem and a quick Google search proves this. Sharp even offered a recall at one stage.
If your microwave oven suffers a similar fate and you could give this a try. Note that it is not actually an LED display as some seem to think; Sharp have simply done a pretty convincing job of making the LCD look like one. Continue reading →
This post describes how to modify a McIntosh PF-2142I (often but incorrectly referred to as PF-21421) JDM car radio to natively tune from 87.5-108MHz as used in most countries around the world. This model of radio is fitted as standard equipment in many JDM Subaru Legacy and Outback cars manufactured between 1998 and 2003. Continue reading →
Normally I try to stick with HP printers when using them in Linux as they seem to have the best support thanks to HP’s efforts with HPLIP.
I recently went against my own advice and purchased a Brother HL-2150N monochrome network laser printer. Brother have at least tried to provide drivers for Linux and even supply Deb packages. Unfortunately installation is a mess involving ugly binary wrappers and packages that don’t appear to conform to Debian policies very well.
Whilst there is no official support for this printer model in Ubuntu 9.10, it can be set up to work via Ethernet fairly easily. Continue reading →
Against my recommendation a relative recently bought a 32GB USB flash drive off Trade Me. It cost something like $85 when such drives are currently about $130 at wholesale rates. Continue reading →
It appears that there are many different ways to interface a seven segment LED display to the Arduino; the humble 4511, 74HC595 shift register and a multitude of fancy (and expensive) serial ICs such as the MAX7219.
I decided to use a 4511 driver IC for this purpose as it was the only suitable chip I had lying around. It saves a few pins over driving the display directly from the Arduino and also works from a wider voltage range so can be used for driving large display modules.