I wanted a quick and dirty route reflector for my home lab (more on that to come) and ended up repurposing an old Exinda 4010 WAN optimiser I had lying about. This unit is really just a re-branded Lanner FW-8756 (refer user manual), a generic x64-64 platform in a 1U rackmount case. It features six Intel gigabit Ethernet ports which was perfect for my intended use case.
It’s certainly not fancy; in the unit I have we find:
- Intel Pentium E5300 CPU (dual core, x86-64, VT-x virtualisation support)
- 4GB RAM (expandable to 8GB by adding another DIMM although more might be possible).
- 500GB SATA HDD (replaceable – the bracket can also has holes to accommodate 2x 2.5″ HDDs but standoffs are required for the SATA cables to clear the motherboard).
- 100Mbps Realtek management port with PXE support
- 6x Intel 82574L Gigabit Ethernet ports
- 2x front panel USB 2.0 ports (plus an internal header for more ports)
In this case my intention was to run a more generic distro on it and install Free Range Routing. In my case I’ve opted for Ubuntu 20.04 LTS as it’s popular, well supported and super easy to build an image for. Pretty much any Linux distro will run on it though. Preparing a basic image to copy directly to headless devices like this is pretty straightforward, and much easier than the more common traditional method connecting a monitor to the motherboard headers and booting off an external drive.
This post will focus on getting this specific unit running as a generic Linux box, as well as explaining the process used for building an image that should work with minimal effort on a large range of similar devices.
I’ve also since tried this on a Watchguard M400 which is another rebranded Lanner product with a similiar design. The only major difference to the steps below being that there is no LAN bypass feature to worry about and the network interface name for the first Gigabit port is enp3s0.
Disable LAN Bypass
When I originally tried running a vanilla distro on the FW-8756 I couldn’t get the gigabit Ethernet ports to detect a link, despite everything looking normal in the OS.
It turns out the FW-8756 is one of several similar models with a “LAN bypass” feature. This consists of a series of bistable relays that can electrically connect each pair of network interfaces on the front panel, bypassing the NICs on the motherboard entirely. The bypass feature is software controllable via an I2C interface.
The FW-8756 platform was designed for use by WAN optimisers (as the Exinda 4010 is), so this bypass feature means that when it fails or is shut down the network link can continue to function as normal, albeit without the optimisation features provided by the unit.
This is all very clever except that it the default state is to go into bypass mode by default and isolate the ports from the internal NICs until switched over by a software included in the original firmware. When we install a generic OS there is no means out of the box to switch this over, and the LAN Bypass settings in the BIOS appeared to have no effect.
Rather than fudge a software fix, it appeared from the board layout that U93 next to the mini PCI slot was likely to be responsible for controlling this feature. There is an unmarked and undocumented jumper on the motherboard near this slot that appears to disable this bypass function permanently, making the network interfaces behave normally. There is an amber LED (LED12) near this jumper that appears to illuminate steadily when the LAN bypass function is operational, and flash when it is in bypass mode.
To make the network interfaces function with a generic Linux distro like Ubuntu you should permanently disable the LAN bypass feature entirely. Move the jumper so that it bridges pins 2-3 (closest to the front panel). The unit must be completely powered off (i.e. physically remove the power cord for at least five seconds) for this to apply.

Serial Console and BIOS Reset
In the case of the Exinda 4010 I wasn’t able to get a serial console immediately so resorted to resetting the BIOS via the jumper next to the battery. After this I was able to get access to the console at 9600 8N1 using a common Cisco-style serial cable.
The instructions below assume the use of screen as a terminal emulator, although you can use your preferred application (e.g. minicom, HyperTerminal, PuTTY, etc). Ensure you use ANSI terminal mode so that the output displays correctly. Command line terminal emulators typically rely on the TERM environment variable for this, e.g:
TERM=ansi screen /dev/ttyUSB0 9600When the device is first booted after a BIOS reset the machine will pause for input during POST, requiring F1 to be pressed to enter the BIOS setup. Several options exist:
- Some terminal emulators will interpret F1 properly – just press the key and away you go.
- Connecting a USB keyboard to the machine itself and pressing F1 also works as an alternative.
- If your terminal emulator doesn’t interpret the F1 key, another option is to quit the terminal emulator and run the commands below from a shell. The first command sets the serial port to 9600 baud and the second sends an escape character followed by the letters
OPwhich combine to simulate pressing F1.
stty -F /dev/ttyUSB0 9600
echo -e '\eOP' > /dev/ttyUSB0
To enter the BIOS setup on subsequent boots press the tab key during POST instead of F1.
In most cases (including if you flash the image I’ve described below) I’d recommend setting the following settings in the BIOS to improve serial access:
Advanced -> Remote Access:
- Serial Port Mode: 115200 8, n, 1
- Terminal Type: VT100
From this point on you should connect to the serial console at 115200 baud.
Quick Start
If you just want to use the thing and don’t care about making an image yourself, here are the basic steps:
- Download the image.
- Decompress and write the image directly to a disk:
zcat ubuntu-focal_exinda4010_amd64.img.gz | sudo dd of=/dev/sdb bs=1M oflag=direct status=progress - Optionally grow the partition size and filesystem to fill the disk:
sudo parted /dev/sdb resizepart 1 100%
sudo e2fsck -f /dev/sdb1
sudo resize2fs /dev/sdb1 - Insert the disk into the device and boot it up.
- Access the device via serial or SSH.
Creating an Image From Scratch
If you would prefer to create an image from scratch rather than download a pre-made one you can do so using the following method.
As I’m opting for Ubuntu and using debootstrap to create the image, these steps will need to be run on a system running a Debian derivative of some type (including Ubuntu itself).
Install debootstrap on your system:
sudo apt install debootstrapNow we need to decide on the storage media. You could either make a disk image file and perform all the operations in that, or do all the work directly on a disk.
Disk
If you opt for a disk then connect it to the system you are building the image on (e.g. via a USB adapter) and immediately check dmesg for the device node:
dmesg| tail
[110875.167672] usb 4-1: SerialNumber: 1254201617020
[110875.175233] scsi host7: uas
[110875.176092] scsi 7:0:0:0: Direct-Access     ASMT     2115             0    PQ: 0 ANSI: 6
[110875.176833] sd 7:0:0:0: Attached scsi generic sg2 type 0
[110875.179118] sd 7:0:0:0: [sdb] 31277232 512-byte logical blocks: (16.0 GB/14.9 GiB)
[110875.179248] sd 7:0:0:0: [sdb] Write Protect is off
[110875.179264] sd 7:0:0:0: [sdb] Mode Sense: 43 00 00 00
[110875.179480] sd 7:0:0:0: [sdb] Write cache: enabled, read cache: enabled, doesn't support DPO or FUA
[110875.179880] sd 7:0:0:0: [sdb] Optimal transfer size 33553920 bytes
[110875.203855] sd 7:0:0:0: [sdb] Attached SCSI disk
In the above example the disk is /dev/sdb but yours may vary slightly. If it is different to sdb then you will need to modify all of the commands in the examples below to suit.
Image File
As an alternative to directly connecting the disk, create a 4GB image file we can using the following command:
dd if=/dev/zero of=exinda-4010-ubuntu-focal-amd64.img bs=1M count=1 seek=4095This generates a 4GB “sparse” (also known as thin provisioned) file; although ls will report it as 4GB in size, du will show the disk usage as the actual space used up by the file. This process saves writing out a large number of zeros to fill the file, although at the risk of filling the parent filesystem as the file is written to later if there is insufficient space available.
Now set up the image as a loop device so that we can treat it just like a normal block device (i.e. disk):
sudo losetup --show -f exinda-4010-ubuntu-focal-amd64.imgNote the output of the above command; this is the path to the loopback device (e.g. /dev/loop0).
From here use this path as the path to the disk for the remaining commands in this post. The rest of the process is exactly the same.
Partition and Format
The first step is to create a partition table, partition and format the disk, regardless of whether you opted for an image file or directly writing to disk. Don’t blindly copy and paste these commands – you will need to bear in mind the path to the disk or image file and use what is appropriate for your system.
sudo parted /dev/sdb mklabel msdosCreate a primary partition that fills the disk:
sudo parted /dev/sdb mkpart pri ext2 0% 100%If you used a disk, the path to the new partition device is likely the same as the disk path with a 1 appended (e.g. /dev/sdb1). If you are using an image attached with a loopback device, the partition path will be the loop device appended with p1 (e.g. /dev/loop0p1). Now create an ext4 filesystem in the new partition:
sudo mkfs.ext4 /dev/sdb1Mount the new partition to a location on your system. In many cases the /mnt directory is a good choice, unless you’ve already used it for something else in which case you can probably figure out how to make a suitable mount point of your own. 🙂
sudo mount /dev/sdb1 /mntBuild the Image
Now use debootstrap to build a base operating system image. The two major arguments you need are:
- Distro codename (e.g. focal for Ubuntu 20.04 LTS “Focal Fossa”).
- Path to a mirror to use for downloading packages.
Consult your preferred distro documentation to find out what codenames and mirror locations to use. The command below will work for Ubuntu 20.04 from the New Zealand mirror. If you are not in New Zealand then you may wish to substitute nz. with your own country code, or remove it altogether for the primary Ubuntu mirror:
sudo debootstrap focal /mnt http://nz.archive.ubuntu.com/ubuntuOnce that’s done, mount the /dev tree inside the image so that the disk devices on your system are accessible while in the chroot:
sudo mount -o bind /dev /mnt/devNow chroot into the image to get a root shell. Note that we should set the locale to C to avoid warnings being thrown about locale mis-matches when running some commands. We can fix up locales later.
LANG=C sudo chroot /mntTemporarily mount /proc and /sys so the chroot environment looks like a normal root file system and other things work as expected:
mount -t proc proc /proc
mount -t sysfs sysfs /sys
Configure and Update the Image
Add an entry for the root filesystem to /etc/fstab (noting the disk path used by the blkid command should match the one you used in previous steps):
cat << EOF > /etc/fstab
UUID=$(blkid /dev/sdb1 | cut -d\" -f2) / ext4 errors=remount-ro 0 1
EOF
If you are using Ubuntu, ensure the updates and security repositories are enabled and then patch the image with the latest packages:
cat << EOF > /etc/apt/sources.list
deb http://nz.archive.ubuntu.com/ubuntu focal main restricted universe multiverse
deb http://nz.archive.ubuntu.com/ubuntu focal-updates main restricted universe multiverse
deb http://security.ubuntu.com/ubuntu focal-security main restricted universe multiverse
EOF

apt update
apt -y dist-upgrade
Install the kernel image, the GRUB bootloader, SSH and some other useful tools for the system:
apt -y install linux-image-generic grub2-common openssh-server bridge-utils ethtoolClear out the package cache to reduce the image size a little:
apt cleanAdd the following config to /etc/default/grub to enable the serial console, we well as disabling the existing quiet boot mode so that kernel messages are logged to the console:
GRUB_CMDLINE_LINUX_DEFAULT="console=tty0 console=ttyS0,115200n8"

# Uncomment to disable graphical terminal (grub-pc only)
GRUB_TERMINAL=serial
GRUB_SERIAL_COMMAND="serial --speed=115200 --unit=0 --word=8 --parity=no --stop=1"
Disable the GRUB OS prober – this prevents the GRUB update command from adding entries for operating systems on other disks in the host system:
rm /etc/grub.d/30_os-proberUpdate GRUB config to apply the above changes and then write the GRUB bootloader to the disk. Note the disk path again – change this to suit your system if need be.
update-grub
grub-install /dev/sdb
Set the hostname (feel free to change this to anything you like):
echo exinda > /etc/hostnameGenerate a basic network config for the management port (enp7s1). We can either use DHCP or set a static IP address – up to you! If you’d rather use the first gigabit network port then change enp7s1 to ens32 in the examples below. Other configurations are also possible.
DHCP Config
Run this command to generate network configuration to obtain an IP address via DHCP:
cat << EOF > /etc/netplan/01-default.yaml
network:
  version: 2
  renderer: networkd
  ethernets:
    enp7s1:
      dhcp4: true
Static IP Config
Run this command to generate network configuration to configure a static IP address:
cat << EOF > /etc/netplan/01-default.yaml
network:
  version: 2
  renderer: networkd
  ethernets:
    enp7s1:
      addresses:
        - 192.168.1.10/24
      gateway4: 192.168.1.1
      nameservers:
        addresses:
          - 192.168.1.1
          - 192.168.1.2
EOF
The final step is to make a group called admin (this enables sudo access out of the box in Ubuntu) and user account to log in with that is a member of this group. The third command sets the password for this user.
groupadd admin
useradd -s /bin/bash -m -d /home/user -G admin user
passwd user
Finish Up
That’s it! Exit the chroot, then unmount the filesystems before disconnecting the disk:
exit
sudo umount /mnt/{dev,proc,sys} /mnt
If you used an image file instead of writing directly to a disk there are a couple of extra steps. If you intend to compress the image for distribution then you can choose to zeroise any unused blocks from old files that were removed during patching to further improve compression – this almost halved the size of the compressed image in my case. This step is purely optional and a downside is that it will fill up a sparse image file with zeros causing it to take up the entire space on disk:
sudo zerofree /dev/loop0p1Finally, if you are working on an image file then you should remove the loopback device attached to the image:
sudo losetup -d /dev/loop0From here the drive can be installed directly into the Exinda appliance. If you opted for an image file then write this to a suitable disk and install that, e.g:
sudo dd if=exinda-4010-ubuntu-focal-amd64.img of=/dev/sdb bs=1M oflag=direct status=progressFilesystem Expansion
The image I created is only 4GB, so if you want to use all of the space on a bigger disk it’s pretty easy to expand this after writing it to a disk.
First resize the partition:
sudo parted /dev/sdb resizepart 1 100%Then force a filesystem check and resize it:
sudo e2fsck -f /dev/sdb1
sudo resize2fs /dev/sdb1
Testing
Connect a serial cable and start session at 115600 baud using your favourite terminal emulator, e.g:
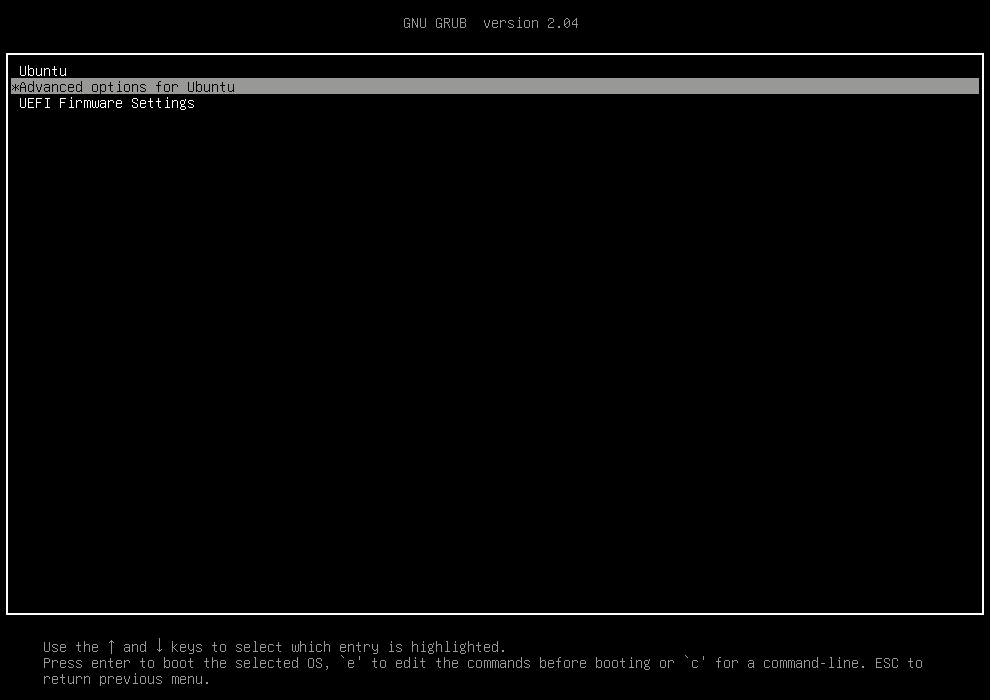
screen /dev/ttyUSB0 115200Make sure the system boots up and that you can login using the credentials supplied when making the image.
Alternatively you should be able to access the unit via SSH on the management interface.
From here it’s just another Linux box so do with it what you please!
Footnote: Exinda 4010 Hardware Info
A couple of quick hardware stats from the Exinda 4010 for those interested:
lscpu
Architecture:        x86_64
CPU op-mode(s):      32-bit, 64-bit
Byte Order:          Little Endian
CPU(s):              2
On-line CPU(s) list: 0,1
Thread(s) per core:  1
Core(s) per socket:  2
Socket(s):           1
NUMA node(s):        1
Vendor ID:           GenuineIntel
CPU family:          6
Model:               23
Model name:          Pentium(R) Dual-Core  CPU      E5300  @ 2.60GHz
Stepping:            10
CPU MHz:             1227.586
BogoMIPS:            5186.89
Virtualization:      VT-x
L1d cache:           32K
L1i cache:           32K
L2 cache:            2048K
NUMA node0 CPU(s):   0,1
Flags:               fpu vme de pse tsc msr pae mce cx8 apic sep mtrr pge mca cmov pat pse36 clflush dts acpi mmx fxsr sse sse2 ss ht tm pbe syscall nx lm constant_tsc arch_perfmon pebs bts rep_good nopl cpuid aperfmperf pni dtes64 monitor ds_cpl vmx est tm2 ssse3 cx16 xtpr pdcm xsave lahf_lm pti tpr_shadow vnmi flexpriority dtherm

lspci
00:00.0 Host bridge: Intel Corporation 4 Series Chipset DRAM Controller (rev 03)
00:02.0 VGA compatible controller: Intel Corporation 4 Series Chipset Integrated Graphics Controller (rev 03)
00:1c.0 PCI bridge: Intel Corporation NM10/ICH7 Family PCI Express Port 1 (rev 01)
00:1c.1 PCI bridge: Intel Corporation NM10/ICH7 Family PCI Express Port 2 (rev 01)
00:1c.2 PCI bridge: Intel Corporation NM10/ICH7 Family PCI Express Port 3 (rev 01)
00:1c.3 PCI bridge: Intel Corporation NM10/ICH7 Family PCI Express Port 4 (rev 01)
00:1c.4 PCI bridge: Intel Corporation 82801GR/GH/GHM (ICH7 Family) PCI Express Port 5 (rev 01)
00:1c.5 PCI bridge: Intel Corporation 82801GR/GH/GHM (ICH7 Family) PCI Express Port 6 (rev 01)
00:1d.0 USB controller: Intel Corporation NM10/ICH7 Family USB UHCI Controller #1 (rev 01)
00:1d.1 USB controller: Intel Corporation NM10/ICH7 Family USB UHCI Controller #2 (rev 01)
00:1d.2 USB controller: Intel Corporation NM10/ICH7 Family USB UHCI Controller #3 (rev 01)
00:1d.3 USB controller: Intel Corporation NM10/ICH7 Family USB UHCI Controller #4 (rev 01)
00:1d.7 USB controller: Intel Corporation NM10/ICH7 Family USB2 EHCI Controller (rev 01)
00:1e.0 PCI bridge: Intel Corporation 82801 PCI Bridge (rev e1)
00:1f.0 ISA bridge: Intel Corporation 82801GB/GR (ICH7 Family) LPC Interface Bridge (rev 01)
00:1f.2 IDE interface: Intel Corporation NM10/ICH7 Family SATA Controller [IDE mode] (rev 01)
00:1f.3 SMBus: Intel Corporation NM10/ICH7 Family SMBus Controller (rev 01)
01:00.0 Ethernet controller: Intel Corporation 82574L Gigabit Network Connection
02:00.0 Ethernet controller: Intel Corporation 82574L Gigabit Network Connection
03:00.0 Ethernet controller: Intel Corporation 82574L Gigabit Network Connection
04:00.0 Ethernet controller: Intel Corporation 82574L Gigabit Network Connection
05:00.0 Ethernet controller: Intel Corporation 82574L Gigabit Network Connection
06:00.0 Ethernet controller: Intel Corporation 82574L Gigabit Network Connection
07:01.0 Ethernet controller: Realtek Semiconductor Co., Ltd. RTL-8100/8101L/8139 PCI Fast Ethernet Adapter (rev 10)