Restoring sanity to Cinnamon 2.0 in Ubuntu Precise

When the Cinnamon 2.0 was recently released for Ubuntu (PPA here) I noticed it broke quite a few default settings and resulted in the desktop looking like quite a mess when logging in. For some machines I had set up for other people to use this caused no end of strife so I investigated a fix.

It seems that Cinnamon 2.0 is now a fork of Gnome 3 rather than a shell, so as a result it now uses its own Gschema settings. Unfortunately it doesn’t bother to migrate any existing settings from Gnome so we end up with a bit of a mess on stock Ubuntu with missing icons and a very broken desktop theme. Fortunately it’s easy to fix!

Window and GTK+ themes

Edit /usr/share/glib-2.0/schemas/org.cinnamon.desktop.interface.gschema.xml and modify the following lines:

    <key type="s" name="icon-theme">
      <default>'Humanity'</default>
      <summary>Icon Theme</summary>
      <description>Icon theme to use for the panel, nautilus etc.</description>
    </key>
    <key type="s" name="gtk-theme">
      <default>'Ambiance'</default>
      <summary>Gtk+ Theme</summary>
      <description>Basename of the default theme used by gtk+.</description>
    </key>


    <key type="s" name="cursor-theme">
      <default>'DMZ-White'</default>
      <summary>Cursor theme</summary>
      <description>Cursor theme name. Used only by Xservers that support the Xcursor extension.</description>
    </key>

Edit /usr/share/glib-2.0/schemas/org.cinnamon.desktop.wm.preferences.gschema.xml and modify the following line:

    <key type="s" name="theme">
      <default>'Ambiance'</default>
      <summary>Current theme</summary>
      <description>The theme determines the appearance of window borders, titlebar, and so forth.</description>
    </key>

Desktop background

Edit /usr/share/glib-2.0/schemas/org.cinnamon.desktop.background.gschema.xml and modify the following line:

    <key type="s" name="picture-uri">
      <default>'file:///usr/share/backgrounds/warty-final-ubuntu.png'</default>
      <summary>Picture URI</summary>
      <description>URI to use for the background image. Not that the backend only supports local (file://) URIs.</description>
    </key>

Apply changes

To actually make the changes take effect we need to recompile the binary schema file from the ones we’ve just edited:

sudo glib-compile-schemas /usr/share/glib-2.0/schemas/
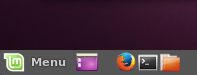
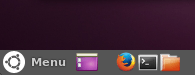
Menu icon

The Mint menu icon also looks pretty ugly and out of place so let’s change it to a nice Ubuntu logo.

sudo sed -i.orig -e 's%/usr/share/cinnamon/theme/menu.png%/usr/share/unity-greeter/ubuntu_badge.png%' /usr/share/cinnamon/applets/menu@cinnamon.org/settings-schema.json

Original Cinnamon menu icon New Cinnamon menu icon

And that pretty much sums it up!

Bootnote

So why not use Mint? Well to be honest I don’t find it particularly good looking and once the surface is scratched it just feels a little kludgy under the hood. Pretty subjective I know, but it just doesn’t quite feel right.

Cinnamon isn’t the most polished of desktop environments either – its multi-monitor support is terrible and in my opinion Nemo feels a little clunky in comparison to Nautilus (not to mention the complete lack of CD/DVD burning support). Where it really shines is the fact that it provides a very low barrier for less technical users who are used to Windows. So much so that I’ve been able to install it in place of Windows and have no complaints from users until this happened. It’s almost enough to make me consider Unity again…

HTC Desire and Belkin car charger

I noticed that my HTC Desire does not charge at full rate off my Belkin Micro USB car charger, despite it being the same rating as the original HTC wall charger (5v, 1A). It appears that the Desire obeys the somewhat recently introduced USB battery charging specification that states devices may draw up to 1.8A if the D+ and D- pins are connected by a resistance of no more than 200 Ohms.

This post shows how I modded my Belkin Micro USB car charger to charge my Desire at the full rate of almost 1A.

Getting the charger open is relatively easy; use a small flat screwdriver to pry the two halves apart. Note that the faceplate is attached to the side closest to the power LED. If the screwdriver takes too much effort you can use a vise to gently squeeze the sides along the seam to help break the seal.

Once the seal is broken the metal pin on the front will probably ping out and land somewhere awkward like under your workbench, so be prepared!

In inside looks quite tidy and simple:

Now solder a 180 Ohm resistor across pins 2 and 3 of the USB port.

To get it back together simply put a few drops of super glue along the seam. I used Selley’s Plastic Glue which is exceptionally good.

After this the battery status (Settings, About phone, Battery) shows as Charging (AC) instead of Charging (USB), indicating that the battery is now charging at full rate.

A guide to hacking Japanese car radios

Do you have a Japanese import car that won’t tune to local FM radio stations? It’s a well known fact that Japan uses a different public FM broadcast band to the rest of the world; 76 to 90 MHz instead of the usual 87.5 to 108 MHz CCIR band. Sure you can use a band expander but these suffer from a number of drawbacks, not to mention that the radio does not display the correct frequency of the station you are tuned to.

Here’s a guide on hacking your radio to convert it to natively tune across the CCIR band. This post is still a work in progress so I may update it from time to time and add more photos as I get the chance. Continue reading

Subaru Legacy McIntosh subwoofer hack

Here’s a quickie on adjusting the gain of the OEM-supplied McIntosh subwoofer in many BE and BH series (MY 1998-2003) Subaru Legacy’s. The subwoofer gain and crossover frequency is non-adjustable, at least until now. : ) If you have such a car and want to get a little more punch from the sub, read on!

The amplifier is bolted to the floor under the drivers seat and has two connectors on the end closest to the door. Disconnect and unbolt the amplifier and take it apart. Make a careful note of where each screw goes as they are not interchangeable; you can permanently damage the amp by shorting things out of you replace the screws incorrectly.

Find R519 on the underside of the PCB near the power and speaker connector. In station wagons this is rated at 10k  and in sedans 4.7k, labeled as either 103 or 472 respectively. This resistor sets the negative feedback in the final stage of the subwoofer crossover.

Identifying R519

Replace this resistor with a higher value to increase the gain. Don’t leave it out of the circuit or it may overdrive the sub and do damage. If you short it you will mute the sub entirely.

R519 replaced

After some experimenting I feel 33k delivers quite a nice bit of punch in a station wagon, which should boost the sub by about 5.2dB. Feel free to choose any value you want between 10-100k. Be careful using high values as it becomes quite easy to inadvertently overdrive the sub.

You might want to use a potentiometer instead so you can adjust the sub gain as you please. If you do this, I suggest a 50k linear (type B) pot in series with a 10k resistor. Make sure you use shielded cable and keep the cable very short to help prevent any instability in the amp. Connect the cable shield to a suitable ground point in the amp and (ideally) a 100nF or similar capacitor between the cable shield and the pot casing to prevent possible ground loops.

Enjoy!

Japanese import FM tuner conversion

This post describes how to modify a McIntosh PF-2142I (often but incorrectly referred to as PF-21421) JDM car radio to natively tune from 87.5-108MHz as used in most countries around the world. This model of radio is fitted as standard equipment in many JDM Subaru Legacy and Outback cars manufactured between 1998 and 2003. Continue reading